Upscale Latent (by)
The Upscale Latent (by) node in ComfyUI is a deceptively simple but incredibly powerful utility designed for upscaling latent space tensors—the encoded image representations that Stable Diffusion models manipulate before decoding them into pixels. In short, this node makes your image "bigger" in latent space, meaning you can preserve details, prompt fidelity, and generation coherence before decoding, compositing, or feeding the data into downstream processing like a KSampler or Decode node.
If you’ve ever found yourself saying, “Wow, this image is great—if only it were 2x the size without turning into abstract mush,” then this node is your new best friend.
🧠 Purpose
Unlike pixel-based upscalers (e.g., ESRGAN, Real-ESRGAN), this node operates before decoding, which makes it much faster and more efficient for workflows that require upscaling mid-generation. You can:
- Prep a latent image for high-res generation via multi-stage sampling.
- Enable better composition control in img2img workflows.
- Expand the canvas for ControlNet, Inpaint, or Masked workflows without jumping out to pixels and back.
🔌 Node Inputs
| Name | Type | Description |
|---|---|---|
| LATENT | LATENT | The latent tensor to be upscaled. Usually output from nodes like Empty Latent Image, KSampler, or other generation steps. |
📤 Node Outputs
| Name | Type | Description |
|---|---|---|
| LATENT | LATENT | The upscaled latent image. Use this with downstream nodes like KSampler, VAE Decode, or Latent to Image. |
⚙️ Parameters and Settings (Deep Dive)
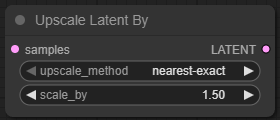
🪜 scale_by (Float)
Definition: The numeric multiplier for the size of the latent tensor.
- Default:
2.0 - Range: Any positive float (commonly
1.0to4.0) - What it does: Multiplies the latent width and height by this value. For example, a latent of 64×64 with
scale_by = 2becomes 128×128. - Importance: Upscaling too much (e.g., 4x) can quickly balloon the latent size and slow down sampling or decoding steps. It’s generally best to keep it at 1.5x or 2x unless you really need a mega-frame.
💡 Tip: Use 2.0x as a sweet spot when prepping for high-res inpainting or detailed resampling.
🧬 upscale_method (Dropdown)
Definition: Chooses the interpolation algorithm used to scale up the latent tensor.
Options include:
| Method | Description | Strengths | Weaknesses | Best Use Case |
|---|---|---|---|---|
nearest-exact | Nearest neighbor interpolation (rounded sizes) | Fastest, zero artifacts, sharp edges preserved | Very blocky, no smoothing | Stylized art, pixel art, hard-edged graphics |
bilinear | Linear interpolation between pixel values | Smooth gradients, fast | Slightly blurry on edges | General use, portraits, anime |
area | Area resampling (averaging) | Excellent for reducing aliasing and noise | May oversmooth fine details | Photo-realistic workflows, scenes with lots of structure |
bicubic | Cubic interpolation using 16 pixels | High quality, preserves edges while smoothing | Slower than bilinear, can cause ringing artifacts | Hyper-realistic models, LoRAs with fine fabric or texture |
bislerp | Bicubic + linear blend hybrid | Best of both worlds—balanced detail and smoothness | May not offer huge advantage over bicubic in all cases | When bicubic is too sharp, bilinear is too soft |
🧪 Experimental insight: If you’re chaining multiple
KSamplerpasses,bicubicorbislerpoften retains prompt detail better, whileareais great if your intermediate outputs feel "noisy" or "crispy."
🔁 Workflow Integration
🛠️ Common Use Cases
- High-Resolution Generation (Two-Stage Sampling):
Empty Latent → KSampler (Low-res pass) → Upscale Latent (by 2x) → KSampler (High-res refinement)
-
ControlNet Canvas Expansion:
- Useful when you need to provide a ControlNet model a larger working space without changing pixel resolution too early.
-
Img2Img or Inpaint Prep:
- Enlarges latent for painting larger areas without smearing or downsampling beforehand.
-
Consistent Output Scaling Across Batches:
- In batch workflows, upscaling latent avoids re-encoding the image multiple times in pixel space.
🧩 Tips and Best Practices
- Pair with VAE Decode later: Always decode after upscaling if your goal is better pixel results.
- Try chaining with
KSamplerandNoise Latent: For clever high-res trickery like SD’s “hires.fix”. - Match
scale_bywith ControlNet input scaling: If you use ControlNet that expects pixel image input (e.g., depth or canny), make sure you upscale before sending the latent to decoder + ControlNet pipeline.
🚨 What-Not-To-Do-Unless-You-Want-a-Fire
You’ve been warned. These are the things that will absolutely trash your workflow, summon the OOM demons, or just leave you staring at a black square for 20 minutes wondering what went wrong.
❌ Set scale_by to 4.0 and feed it to a 50-step KSampler
Unless you're training a patience LoRA, quadrupling latent size increases the tensor area by 16x. You’ll either:
- Crash your GPU,
- Experience time dilation, or
- Get an image so blurry it makes vaseline look like 4K.
❌ Use nearest-exact for photorealism
This is like using Minecraft shaders to render a wedding photo. Unless you want blocky artifacts that make your subject look like a rejected Roblox character, just don’t.
❌ Forget to adjust your ControlNet image resolution
If you're upscaling your latent but still feeding a low-res ControlNet image, congratulations—you now have mismatched resolutions and a ControlNet that thinks it’s painting on a napkin while your latent is mural-sized. Align your canvas, Picasso.
❌ Chain Upscale Latent (by) after decoding
That’s not how this works. This node is for latent space. Once you decode to image, it’s too late—use a pixel-based upscaler like Ultimate SD Upscale or Image Resize. Otherwise, all you’ve done is upscale an already pixelated image. Gross.
❌ Expect “magic fix everything” quality boosts
This node doesn't add details—it spreads them out. If your image is mush at 512×512, it’ll be bigger mush at 1024×1024. Use this node in tandem with a second pass through a sampler or ControlNet for best results.
❌ Assume all models will behave well with bigger latents
Some checkpoints (especially finely-tuned LoRAs or special VAEs) were trained and tested on 512px or smaller latent spaces. If you upscale those, outputs might suffer (or hallucinate wild nonsense). Test before production.
🧪 Advanced Tricks
- Use with
ControlNet Tilefor super-resolution pipelines, especially when using realistic checkpoints likeepicDiffusionorghostMix. - For LoRA character renders, scale latent before the second KSampler to help refine accessories (hats, hair, etc.) without having to upscale the image with an external tool.
✅ Summary
| Parameter | Description |
|---|---|
scale_by | Float value to scale the latent resolution. Recommended: 1.5–2.0 |
upscale_method | Interpolation algorithm for scaling. Choose based on sharpness vs. smoothness needs |
🎯 Pro Tip: If you’re building a two-pass generation system or trying to avoid pixelation in outputs, use
Upscale Latent (by)early in the workflow. It’s a clean, fast, and effective way to go big—without going stupid.